การเชื่อมต่อและใช้งาน DeepSeek API ใน PHP
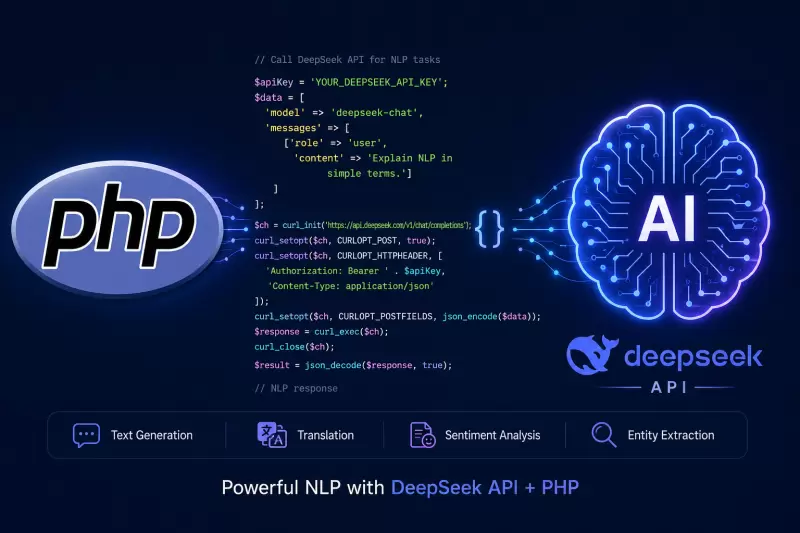
DeepSeek เป็นโมเดลภาษาขนาดใหญ่ที่ทรงพลัง มีให้บริการผ่าน API ทำให้คุณสามารถนำความสามารถด้านการประมวลผลภาษาธรรมชาติไปใช้ในแอปพลิเคชัน PHP ของคุณได้อย่างง่ายดาย บทความนี้จะแนะนำขั้นตอนการเชื่อมต่อและใช้งาน DeepSeek API อย่างละเอียด พร้อมตัวอย่างโค้ดที่นำไปปรับใช้ได้จริง
เตรียม API Key
ก่อนอื่นคุณต้องสมัครใช้งานและรับ API Key จาก DeepSeek
- ไปที่ platform.deepseek.com
- ลงทะเบียนหรือเข้าสู่ระบบ
- ไปที่ส่วน API Keys แล้วคลิก Create new key
- คัดลอก API Key ที่ได้มาเก็บไว้อย่างปลอดภัย (จะเห็นแค่ครั้งเดียว)
⚠️ ข้อควรระวัง อย่าใส่ API Key ลงในโค้ดโดยตรงเมื่อขึ้น Production ควรใช้ตัวแปรสภาพแวดล้อมหรือไฟล์ config ที่ไม่ถูก commit ขึ้น Git
การเรียก DeepSeek API ด้วย cURL
DeepSeek ใช้ API endpoint เดียวกับ OpenAI (/v1/chat/completions) ดังนั้นโค้ดที่เขียนสำหรับ OpenAI ก็สามารถนำมาปรับใช้ได้ทันที
- Endpoint
https://api.deepseek.com/v1/chat/completions - Method POST
- Headers
Authorization: Bearer YOUR_API_KEYContent-Type: application/json
ตัวอย่างโครงสร้าง request body พื้นฐาน
{

    "model": "deepseek-chat",

    "messages": [

        {"role": "system", "content": "คุณคือผู้ช่วยที่เป็นประโยชน์"},

        {"role": "user", "content": "สวัสดี"}

    ]

}
สร้างฟังก์ชันสำหรับเรียก API
เราจะสร้างฟังก์ชัน PHP ที่รับข้อความจากผู้ใช้ ส่งไปยัง DeepSeek และคืนค่าคำตอบกลับมา
<?php

/**

 * ส่งข้อความไปยัง DeepSeek API และรับคำตอบกลับ

 *

 * @param string $userMessage ข้อความจากผู้ใช้

 * @param string $systemPrompt (optional) คำแนะนำระบบ

 * @param float $temperature (optional) ความสุ่มของคำตอบ (0-2)

 * @param int $maxTokens (optional) จำนวน token สูงสุด

 * @return string|false คำตอบจาก DeepSeek หรือ false หากเกิดข้อผิดพลาด

 */

function callDeepSeek($userMessage, $systemPrompt = "คุณคือผู้ช่วยที่มีประโยชน์และเป็นมิตร", $temperature = 0.7, $maxTokens = 1000)

{

    $apiKey = "YOUR_DEEPSEEK_API_KEY"; // แทนที่ด้วย API Key จริงของคุณ


    $url = "https://api.deepseek.com/v1/chat/completions";


    $data = [

        "model" => "deepseek-chat",

        "messages" => [

            ["role" => "system", "content" => $systemPrompt],

            ["role" => "user", "content" => $userMessage]

        ],

        "temperature" => $temperature,

        "max_tokens" => $maxTokens,

        "stream" => false

    ];


    $payload = json_encode($data);


    $ch = curl_init($url);

    curl_setopt($ch, CURLOPT_RETURNTRANSFER, true);

    curl_setopt($ch, CURLOPT_POST, true);

    curl_setopt($ch, CURLOPT_HTTPHEADER, [

        "Content-Type: application/json",

        "Authorization: Bearer " . $apiKey

    ]);

    curl_setopt($ch, CURLOPT_POSTFIELDS, $payload);

    curl_setopt($ch, CURLOPT_TIMEOUT, 60); // กำหนด timeout 60 วินาที


    $response = curl_exec($ch);

    $httpCode = curl_getinfo($ch, CURLINFO_HTTP_CODE);

    $curlError = curl_error($ch);

    curl_close($ch);


    if ($curlError) {

        error_log("cURL Error: " . $curlError);

        return false;

    }


    if ($httpCode !== 200) {

        error_log("DeepSeek API Error (HTTP $httpCode): " . $response);

        return false;

    }


    $decoded = json_decode($response, true);

    if (isset($decoded['choices'][0]['message']['content'])) {

        return $decoded['choices'][0]['message']['content'];

    }


    error_log("Unexpected API response structure: " . print_r($decoded, true));

    return false;

}
ตัวอย่างการใช้งานจริง
ตัวอย่างที่ 1 การสนทนาพื้นฐาน
<?php

include 'deepseek_functions.php'; // สมมติว่าเก็บฟังก์ชันไว้ในไฟล์นี้


$question = "ขอโทษนะครับ ฉันช่วยอะไรคุณได้บ้าง?";

$answer = callDeepSeek($question);


if ($answer !== false) {

    echo "คำถาม: " . $question . "\n";

    echo "DeepSeek: " . $answer . "\n";

} else {

    echo "เกิดข้อผิดพลาดในการเชื่อมต่อกับ DeepSeek\n";

}
ตัวอย่างที่ 2 แชทบอทแบบโต้ตอบในหน้าเว็บ
<!-- chat.php -->

<?php

session_start();

include 'deepseek_functions.php';


// กำหนด prompt ระบบสำหรับบอท

$systemPrompt = "คุณคือผู้ช่วยลูกค้าสัมพันธ์ของร้านขายหนังสือออนไลน์ " .

                "ตอบด้วยความสุภาพและให้ข้อมูลที่เป็นประโยชน์เกี่ยวกับหนังสือและการสั่งซื้อ";


if ($_SERVER['REQUEST_METHOD'] === 'POST' && isset($_POST['message'])) {

    $userMessage = trim($_POST['message']);


    // เก็บประวัติการสนทนาใน session (แบบง่าย)

    if (!isset($_SESSION['chat_history'])) {

        $_SESSION['chat_history'] = [];

    }

    $_SESSION['chat_history'][] = ["role" => "user", "content" => $userMessage];


    // สร้างข้อความที่จะส่ง รวมประวัติล่าสุด 5 รายการ

    $messagesForAPI = [["role" => "system", "content" => $systemPrompt]];

    $recentHistory = array_slice($_SESSION['chat_history'], -5);

    foreach ($recentHistory as $msg) {

        $messagesForAPI[] = $msg;

    }


    // เรียก API (เราจะปรับฟังก์ชันเดิมให้รองรับ history แบบกำหนดเอง)

    $reply = callDeepSeekWithHistory($messagesForAPI);


    if ($reply !== false) {

        $_SESSION['chat_history'][] = ["role" => "assistant", "content" => $reply];

        echo json_encode(["success" => true, "reply" => $reply]);

    } else {

        echo json_encode(["success" => false, "error" => "ไม่สามารถติดต่อ DeepSeek ได้"]);

    }

    exit;

}

?>

<!DOCTYPE html>

<html>

<head>

    <title>แชทบอทด้วย DeepSeek</title>

    <style>

        #chatbox { border:1px solid #ccc; height:400px; overflow-y:scroll; padding:10px; margin-bottom:10px; }

        .user { text-align:right; color:blue; margin:5px; }

        .bot { text-align:left; color:green; margin:5px; }

    </style>

</head>

<body>

    <h1>DeepSeek แชทบอท</h1>

    <div id="chatbox"></div>

    <input type="text" id="messageInput" placeholder="พิมพ์ข้อความของคุณ..." style="width:80%">

    <button onclick="sendMessage()">ส่ง</button>


    <script>

        function sendMessage() {

            let input = document.getElementById('messageInput');

            let msg = input.value.trim();

            if (!msg) return;


            // แสดงข้อความผู้ใช้

            let chatbox = document.getElementById('chatbox');

            let userDiv = document.createElement('div');

            userDiv.className = 'user';

            userDiv.textContent = 'คุณ: ' + msg;

            chatbox.appendChild(userDiv);

            chatbox.scrollTop = chatbox.scrollHeight;


            input.value = '';


            // ส่ง AJAX

            fetch('chat.php', {

                method: 'POST',

                headers: {'Content-Type': 'application/x-www-form-urlencoded'},

                body: 'message=' + encodeURIComponent(msg)

            })

            .then(res => res.json())

            .then(data => {

                let botDiv = document.createElement('div');

                botDiv.className = 'bot';

                if (data.success) {

                    botDiv.textContent = 'DeepSeek: ' + data.reply;

                } else {

                    botDiv.textContent = 'DeepSeek: ขออภัย เกิดข้อผิดพลาด กรุณาลองใหม่';

                }

                chatbox.appendChild(botDiv);

                chatbox.scrollTop = chatbox.scrollHeight;

            });

        }

    </script>

</body>

</html>
ตัวอย่างที่ 3 สรุปเนื้อหาบทความอัตโนมัติ
<?php

include 'deepseek_functions.php';


$longText = "บทความยาวๆ ที่ต้องการสรุป... (ยกตัวอย่าง)";

$prompt = "กรุณาสรุปเนื้อหาด้านล่างนี้ให้สั้นและได้ใจความสำคัญ โดยสรุปไม่เกิน 3 ประโยค:\n\n" . $longText;


$summary = callDeepSeek($prompt, "คุณคือผู้ช่วยที่เชี่ยวชาญการสรุปเนื้อหา", 0.3, 300);


if ($summary) {

    echo "<h3>บทสรุป:</h3><p>" . nl2br(htmlspecialchars($summary)) . "</p>";

} else {

    echo "ไม่สามารถสรุปเนื้อหาได้ในขณะนี้";

}

?>
การจัดการข้อผิดพลาด
ในการใช้งานจริง ควรจัดการกับสถานการณ์ต่างๆ ดังนี้
<?php

function safeCallDeepSeek($message, $retryCount = 2) {

    $attempt = 0;

    while ($attempt <= $retryCount) {

        $result = callDeepSeek($message);


        if ($result !== false) {

            return $result;

        }


        $attempt++;

        if ($attempt <= $retryCount) {

            sleep(1); // รอ 1 วินาทีก่อนลองใหม่

        }

    }


    // คืนค่าข้อความแสดง error ที่เป็นมิตรกับผู้ใช้

    return "ขออภัย ขณะนี้ระบบไม่สามารถตอบกลับได้ กรุณาลองใหม่อีกครั้งภายหลัง";

}


// ตรวจสอบ quota หรือข้อจำกัดการใช้งาน

function checkDeepSeekQuota($apiKey) {

    // DeepSeek API ไม่มี endpoint ตรวจสอบ quota โดยตรง

    // แต่เราสามารถ log การใช้งานใน database หรือใช้การนับในแอปพลิเคชันเอง

    // ตัวอย่าง: ตรวจสอบว่าวันนี้เรียกไปแล้วไม่เกิน 1000 ครั้ง

    $today = date('Y-m-d');

    // ... โค้ดตรวจสอบการนับในฐานข้อมูล ...

    return true; // หรือ false หากเกิน quota

}
ปรับแต่งพารามิเตอร์เพิ่มเติม
DeepSeek API รองรับพารามิเตอร์หลายตัวที่ช่วยควบคุมพฤติกรรมของโมเดล
| พารามิเตอร์ | ค่าเริ่มต้น | คำอธิบาย |
|---|---|---|
temperature |
0.7 | ความสุ่มของคำตอบ (0 = แน่นอน / 2 = สุ่มมาก) |
top_p |
0.9 | nucleus sampling - เลือก token ที่มี cumulative probability นี้ |
max_tokens |
4096 | จำนวน token สูงสุดที่โมเดลจะตอบกลับ |
presence_penalty |
0 | ปรับลดการพูดหัวข้อซ้ำ (-2 ถึง 2) |
frequency_penalty |
0 | ปรับลดการใช้คำซ้ำ (-2 ถึง 2) |
ตัวอย่างการปรับแต่ง
$response = callDeepSeek(

    "เขียนบทกวีเกี่ยวกับทะเล",

    "คุณคือกวี",

    0.9,  // temperature สูงขึ้นเพื่อความสร้างสรรค์

    200   // max_tokens

);
เทคนิคเพิ่มเติมสำหรับประสิทธิภาพที่ดีขึ้น
1. ใช้ caching เพื่อลดต้นทุนและ latency
function callDeepSeekWithCache($message, $cacheTime = 3600) {

    $cacheKey = 'deepseek_' . md5($message);


    // ตรวจสอบ cache (เช่น Redis หรือ memcached)

    $cached = apcu_fetch($cacheKey);

    if ($cached !== false) {

        return $cached;

    }


    $result = callDeepSeek($message);

    if ($result !== false) {

        apcu_store($cacheKey, $result, $cacheTime);

    }

    return $result;

}
2. ใช้ stream mode (รับคำตอบแบบ real-time)
สำหรับแอปพลิเคชันที่ต้องการตอบสนองแบบทันที สามารถใช้ "stream": true และประมวลผล SSE (Server-Sent Events) แต่การ implement ซับซ้อนกว่า เหมาะสำหรับแชทบอทที่ต้องการประสบการณ์เหมือนพิมพ์สด
สรุป
การนำ DeepSeek มาใช้ในแอป PHP ผ่าน API ทำได้ไม่ยาก โดยใช้ cURL ส่ง request ไปยัง endpoint https://api.deepseek.com/v1/chat/completions พร้อม API key ที่ได้จากการลงทะเบียน ฟังก์ชัน callDeepSeek ที่เราเขียนขึ้นสามารถนำไปใช้ในงานต่างๆ ได้ทันที เช่น แชทบอท, สรุปความ, แปลภาษา, หรือช่วยเขียนเนื้อหา
ข้อดีของ DeepSeek
- ราคาถูกกว่าโมเดลอื่นในระดับเดียวกัน
- รองรับ context ยาวถึง 1M tokens
- มีทั้งโมเดล chat และ code
สิ่งที่ควรระวัง
- API key ต้องเป็นความลับ
- ควรมีระบบ log การใช้งานเพื่อวิเคราะห์ต้นทุน
- จัดการ error ให้เรียบร้อยสำหรับ production
ลองนำตัวอย่างโค้ดไปปรับใช้กับโปรเจกต์ของคุณดู แล้วคุณจะเห็นว่า DeepSeek ช่วยเพิ่มความฉลาดให้แอปพลิเคชัน PHP ได้อย่างมาก!